
Welcome to the First Silhouette Challenge of 2014
This month we were asked to add a project which involved getting organized. This is the first event I am participating in since I am a new member of this group. I am honored to share this page with others who share a passion for learning, growing, sharing ideas, all while using my favorite item in my craft room The Silhouette Cameo. Heck I liked it so much I bought two.
Today I am sharing a new project I have never done before with you. I am just starting to design my craft room at my White Picket Fence Home. This is my first time using the my printer, with the registration marks, then cut with the Cameo. I have to say I am amazed at how this machine works.
Alright it is time for directions to success!!!!!
The first item on our list today is measure your length and width of the size of the labels you need. In my case the Recollection File Drawer is 2" wide and 1" high. Then I made one rectangle to these measurements. I hit fill page but felt that was to close for comfort, so I decided to leave a space between each label by duplicating and pasting to my desired page. This way even if I was off on the printing it would still leave room to cut around the labels.
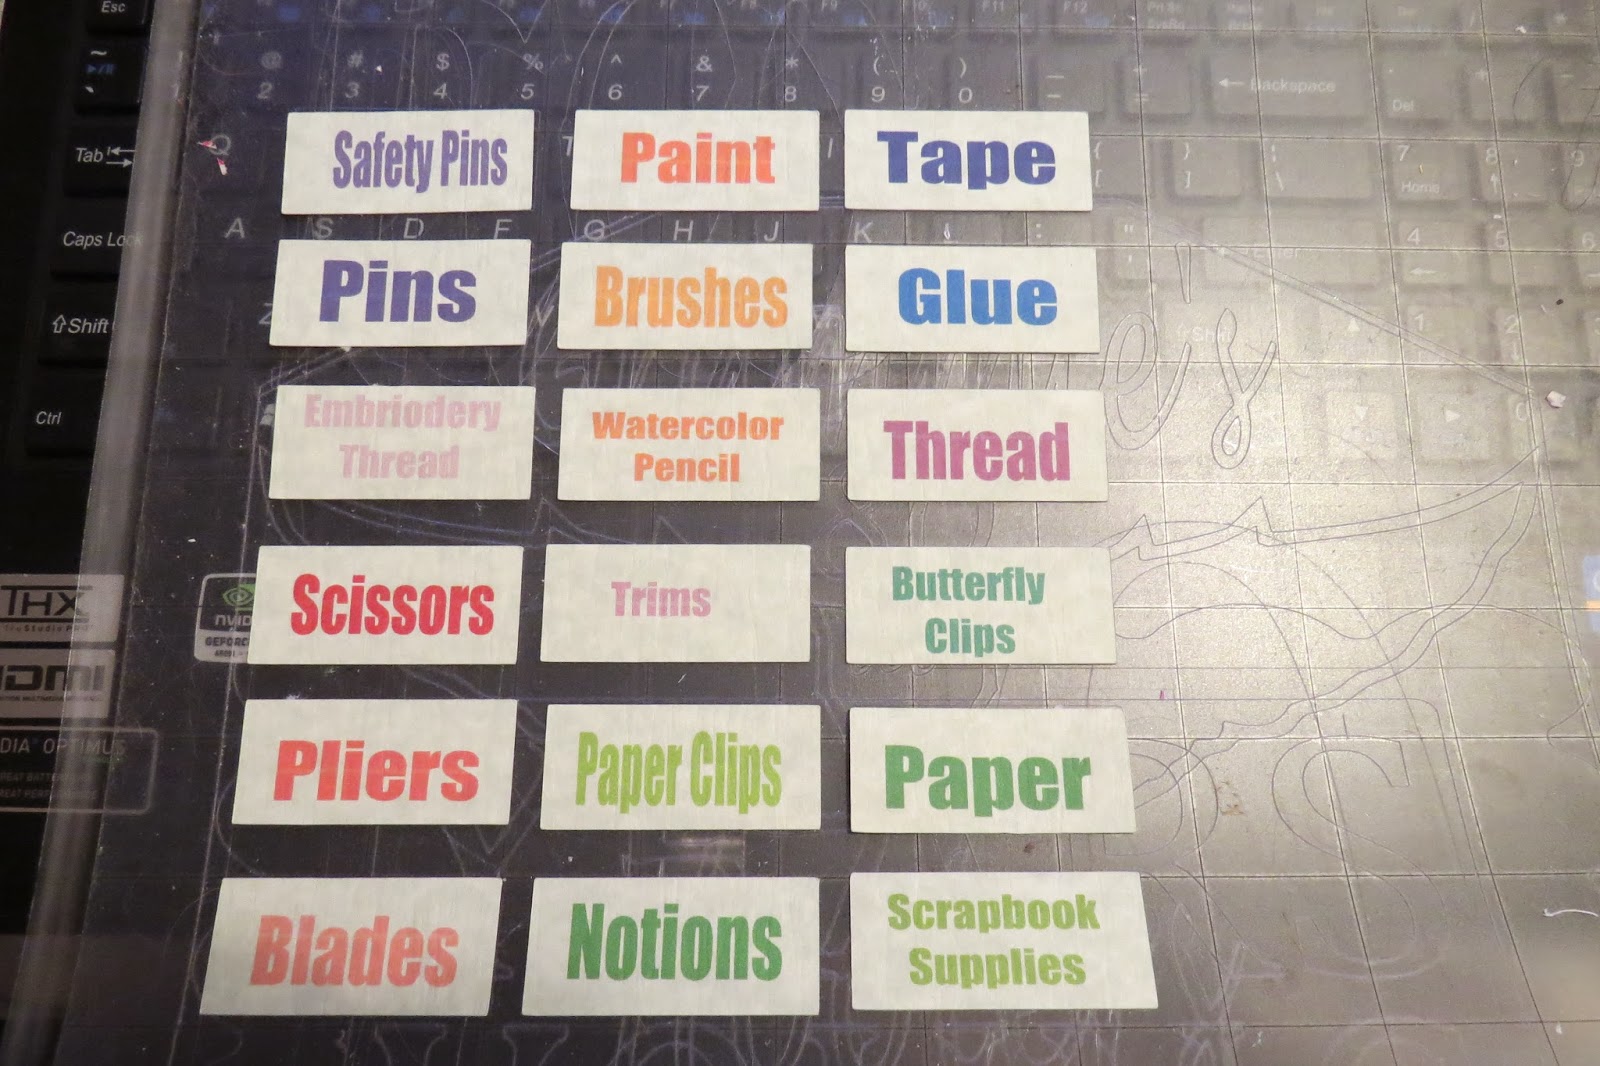
I chose colors that coordinated so each type of supplies is easy to spot by color as well as words. here is the process in pictures.
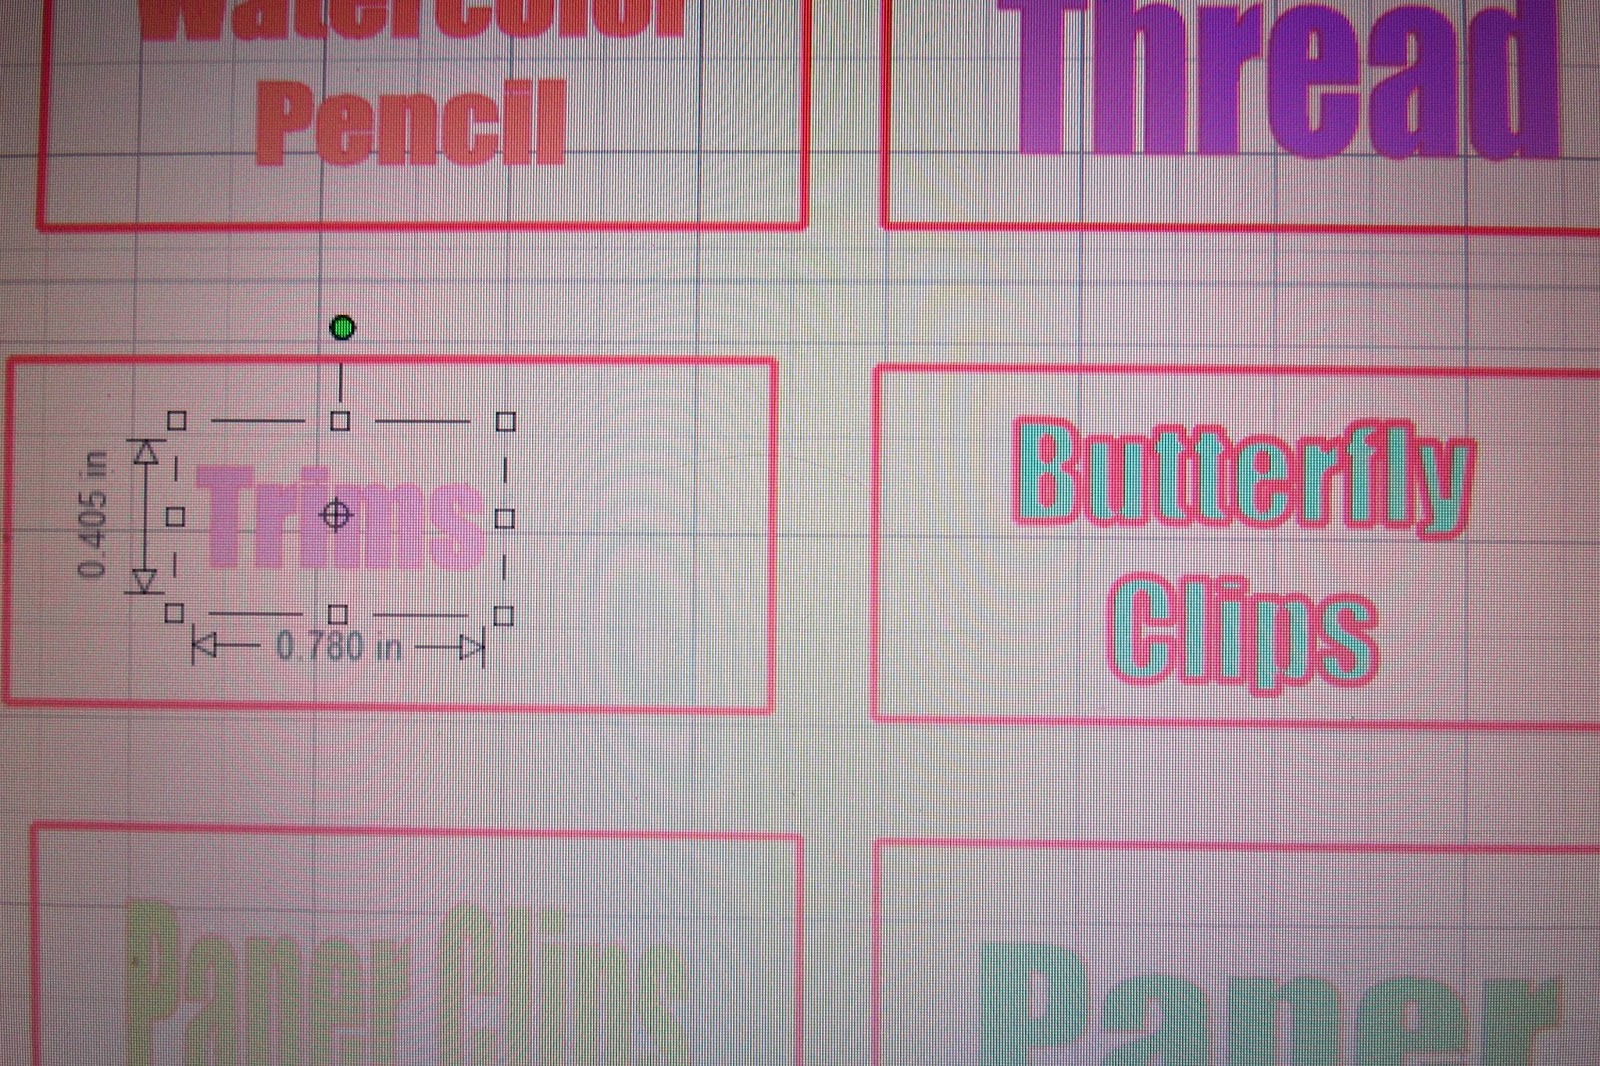
 This is how my page looked with rectangles and words typed in place. See below the screen has with the cut lines around the words Butterfly Clips. Since we do not want to cut these lines I have demonstrated the images to click on to remove theses cut line form the pattern.

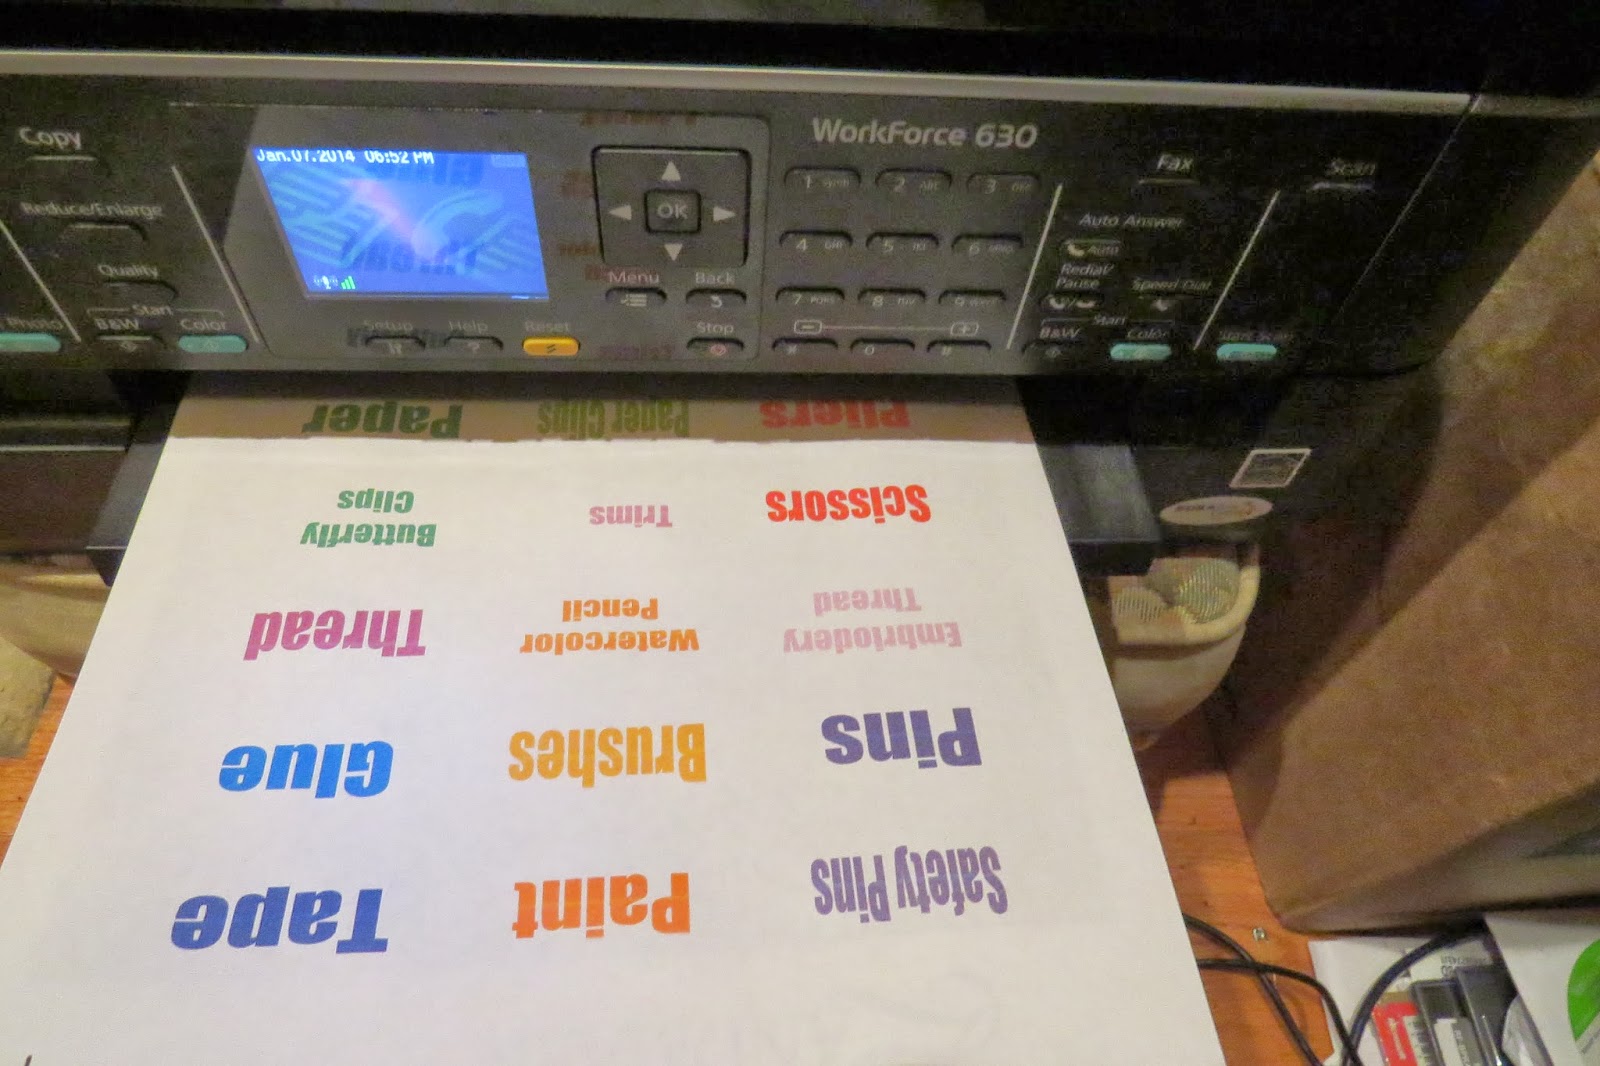
This is how the paper will look when it comes out of the printer
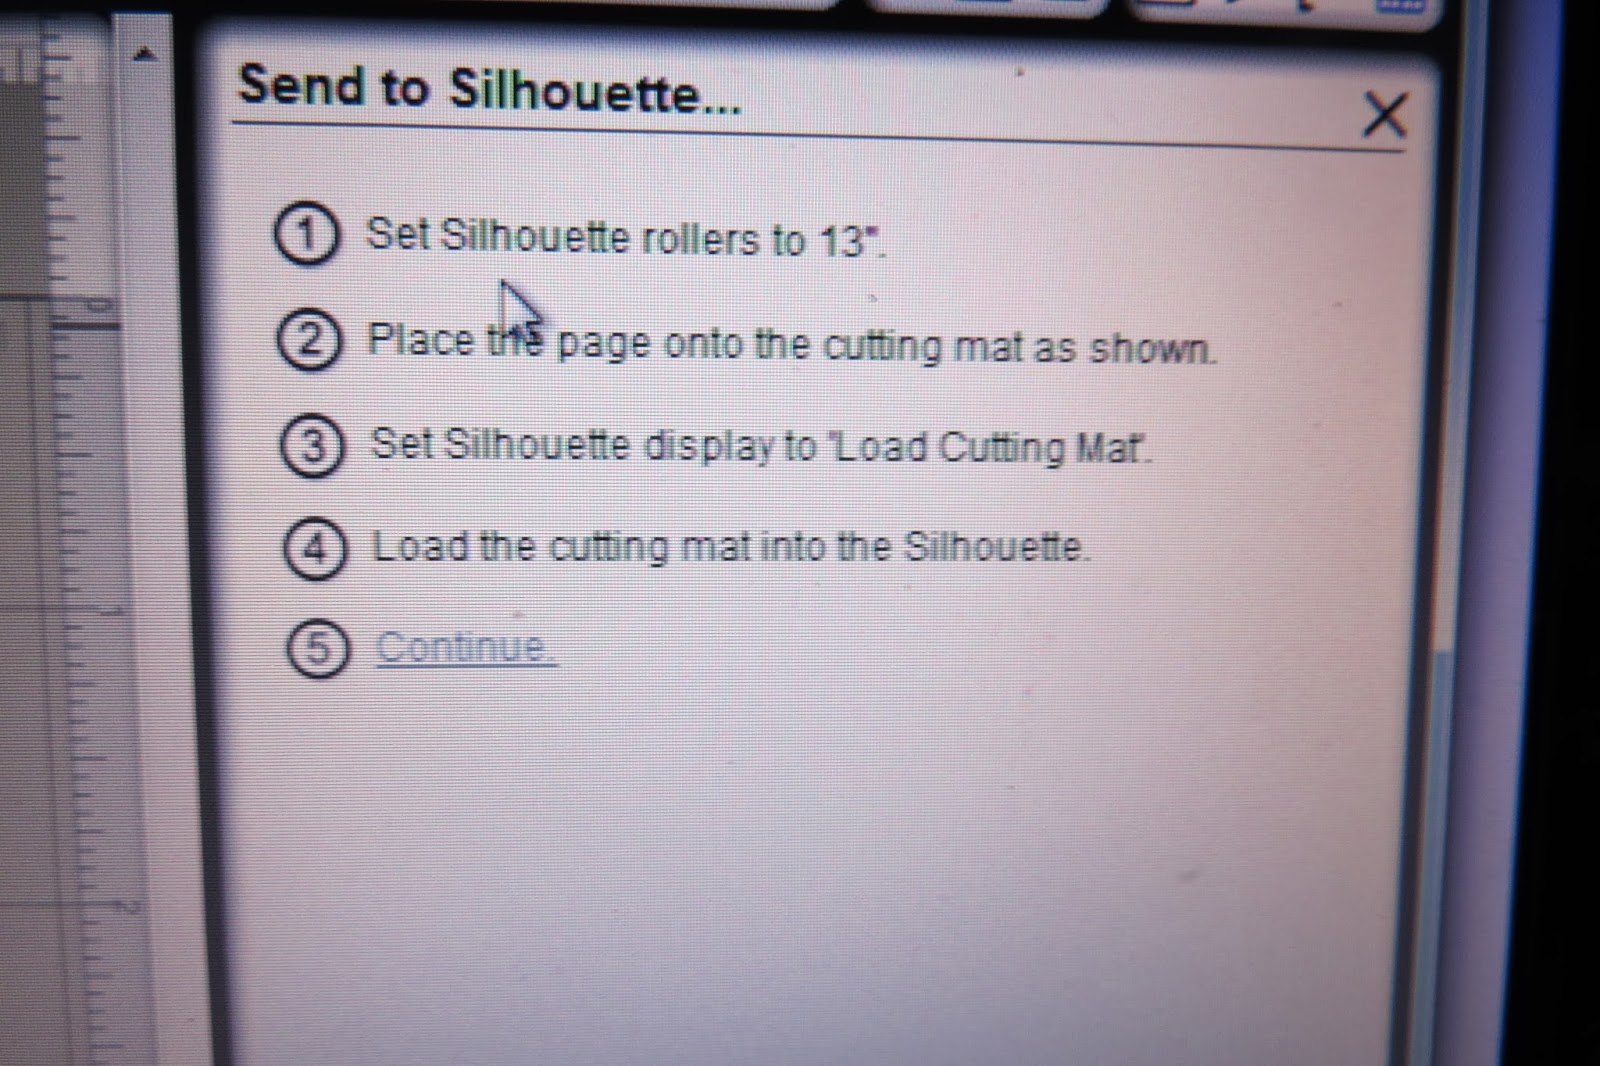
 Follow the directions on the screen.
Set the blade to the right setting for the material you are cutting.

 This is the promise of a new Craft room and the Start of a many friendships through Silhouette Challenge.
Thank you for joining me during this tutorial. I hope this helps you move towards trying a new project yourself. Please share your comments and thoughts with me because, I Love to here from my readers and blogger buddies.

I chose colors that coordinated so each type of supplies is easy to spot by color as well as words. here is the process in pictures.
 This is how my page looked with rectangles and words typed in place. See below the screen has with the cut lines around the words Butterfly Clips. Since we do not want to cut these lines I have demonstrated the images to click on to remove theses cut line form the pattern.
 |
| Highlight the word Trims, then click The Scissor Symbol, next click No Cut |

 |
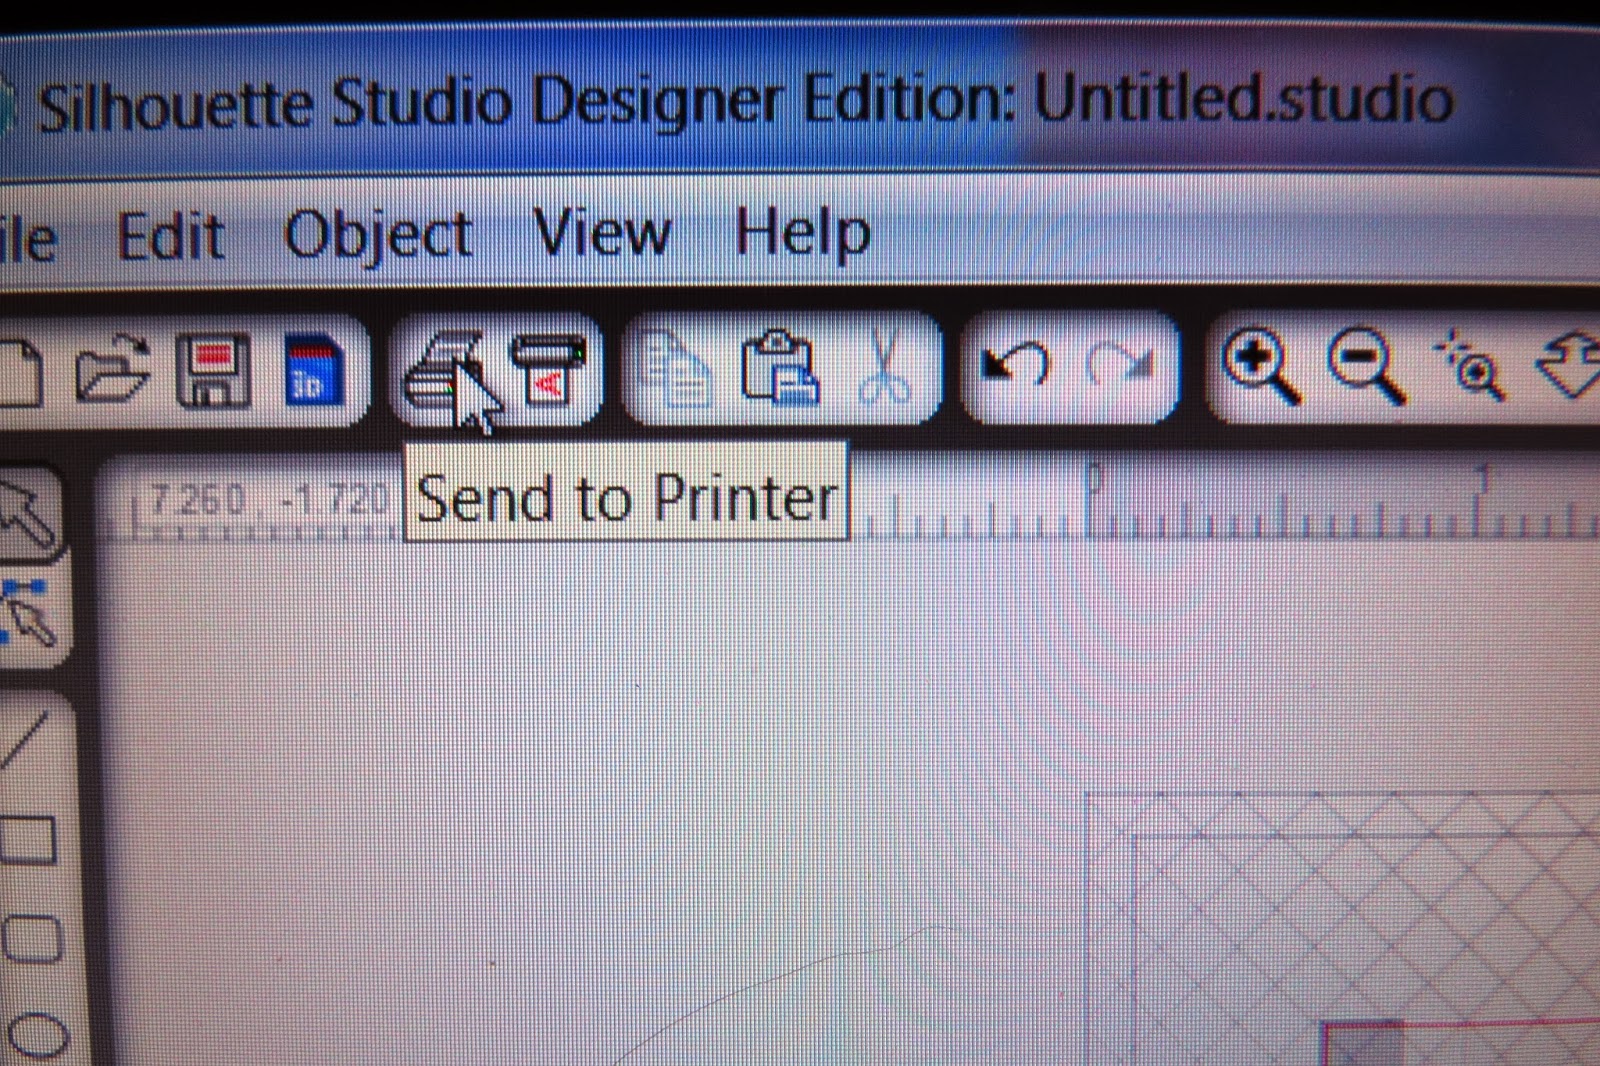
| Make sure you have the registration marks on and send to printer |


 |
| This picture shows what the registration marks look like on the printed page. |
 |
| Set your paper to 8 1/2" X 11" place on your mat as pictured above |


 |
| This is a picture of the Cameo processing the cuts. |
Set the blade to the right setting for the material you are cutting.
 |
| This is the way the labels look weeded. |


Thank you for joining me during this tutorial. I hope this helps you move towards trying a new project yourself. Please share your comments and thoughts with me because, I Love to here from my readers and blogger buddies.
On behalf of The Silhouette Challenge Team Welcome to 2014!
Each Month we will be presenting a wealth of ideas and information to help you use your Silhouette Cameo or Portrait.
Join Me in learning from 35 of my team members who posted to this Months Event!
January's theme is Organization

- DIY Window Shutter Mail Organizer by Weekend Craft
- Kids' Art Wall by Tried & True
- Organizing Silhouette and Craft Supplies by The Happier Homemaker
- Simple Recipe Organization by It's Always Craft Time
- Put a Label on it! Herb Names for Plant Stakes by Get Silvered
- Super Simple Linen Closet Labels by Two Purple Couches
- Beware of the Animals Vinyl Toy Box by A Tossed Salad Life
- Child desk accessories by Architecture of a Mom
- Organizing & the Important of Labels by The Turquoise Home
- Index Card Organizer for Easier Meal Planning by Chicken Scratch NY
- Create Craft Room Labels by Dragonfly & Lilypads
- Simple Storage Solution for your Christmas Ornaments by Vintage News Junkie
- Organize this: DIY Planner Covers, Tags & Dividers (made with Cereal Boxes) by Black and White Obsession
- How to Make a Cut File into a Print & Cut by Create & Babble
- Simple Chest Freezer Organizational Board by Nearly Handmade
- Vinyl Your Kitchen Canisters! by From Wine to Whine
- Nursery Closet Dividers & Silhouette Cut File by Creative Ramblings
- Make Custom Box Templates with a Silhouette for Drawer Organization by One Dog Woof
- Organizing the Craft Room by What's Next Ma
- Vinyl Wall Calendar by Crafts Cakes and Cats
- Personalized Toy Storage Bins by Lil' Mrs. Tori
- Personalized Routine Chart by Work in Progress
- Blog Planner Sheet Dividers + Free Cut Files by TitiCrafty by Camila
- Simple Project Calendar by Little Blue's Room
- Dry Erase Photo Frame Menu Board + Free Cut File by Essentially Eclectic
- Receipt Organization with Free Cut File by The Thinking Closet
- Cute and Easy Labels by Life After Laundry
- "What's For Dinner?" Menu Planning Board by unOriginal Mom
- Mixing Organization and Function: An Easy Conversion Chart by My Paper Craze
- Why do my cookies taste so bad? A lesson in baking. by The Life and Times of a TAP
- Custom Drawer Dividers by Please Excuse My Craftermath...
- The evolution of my labeling system by feto soap
- Ikea Drawer labels by McCall Manor
- Glass Etched Vinegar & Oil bottles by Terri Johnson Creates
- Organize It: Bathroom Closet by The House on Hillbrook
- Ombre Butterfly Magnet Board by Sowdering About
Crafting is always Better with Friends
Show your appreciation we are all volunteers
Please feel free to Share but,
always give the original post credit.
Blogging love is always accepted and appreciated,
You know the drill Click away!


19 comments:
Thanks for the step by step! I love the idea of creating custom labels for craft drawers, and the print and cut feature is a great tool to get really creative with it. Thanks so much for sharing!
I'm working on digging out my craft room/office so this is the perfect inspiration! Thanks!
Great labels. I have post-it notes on my containers in my craft area right now. Hopefully I can get started on my labels in the next two weeks or so.
Love your labels! I too love the print & cut feature.
Great Labels! The print and cut feature is one of my favorite things to do.
I love the print and Cut too! These labels are really great!
Did I read that right - you have two Cameos? Twice the fun!
Kristi, Thank you for your kind words.
Rachel Joyce, Thank you for sharing your comments. Believe me I am super excited to be setting up and designing my own craft room. I hope you will stop by again to see it along the way and when I am finished! I would love to see your room when you dig it out.
Oh my gosh I am a post-it-note nut. At a place of employment they asked me to stop using them so much. It was a design firm with all the projects having so many components I do not know what I would have done with out them. A bin system would have worked too but that was only for samples. Good luck with your project I would love to see it.
Glenna Anderson I am so glad you liked the labels. It was my first time using the print and cut. It worked like a dream.
Oscaralley, Thank you so much, I love the print and cut feature now that I tried it. It was my first attempt and it was easy to accomplish.
Great labels Karen and did I read that right? two Cameos? :)
You certainly did, read that right. I found a steal of a deal last Christmas on Overstock.com. Free shipping, priced lower than half price for most shops, and extra features in the package. So I purchased two thinking a friend may want it but she did not. I first thought I would donate it to an auction I run for a charity. Then after recently purchasing a lake home i decided to keep it to have one in each location. It is extremely easy to travel with because I bought the rolling travel bag in pink. That one goes on road trips with me and the one at the lake I keep in a craft area I have looking out the window at the water. I am Blessed!
I keep seeing all of these amazing bloggers with craft ROOMS! So jealous of your space and the organization your implementing to keep your room so neat and nice! Maybe one day... :)
Janice at +NearlyHandmade, Clever idea for your Freezer Organization Chart. I just want tp say do not be too jealous. We have lived in our home for 27 years and I have never had my own space here, but I do feel like a lucky gal to be starting a place of my own to settle in and create.
You've given me the cottage to try the print and cut feature! Thank you! Thanks fort your kind words on my blog too. I will also be following you on your blog.
Thanks for walking me through the print and cut application. I've never tried it before!
D,
I just noticed your comment today. Thanks for your sweet words. It really was easy but this last project gave me a run for my money.
Happy Creating,
Karen Marie
Emily,
Give it a whirl because it can't hurt you. It may give you joy.
Happy Creating,
Karen Marie
Post a Comment